Stitch
Joining a capture into panels, reading the seam report, and downloading the result.
Stitch takes a complete capture and composites its shots into long panels. It then measures every seam to check that the shots line up.
Opening a capture
- From Capture: Stitch this capture, once every shot is saved.
- From the path column: a row under Prints.
- From the Library: Stitch on a capture row.
- From a file: a capture ZIP, with Import… in the Library or Import capture ZIP in Stitch.
Running it
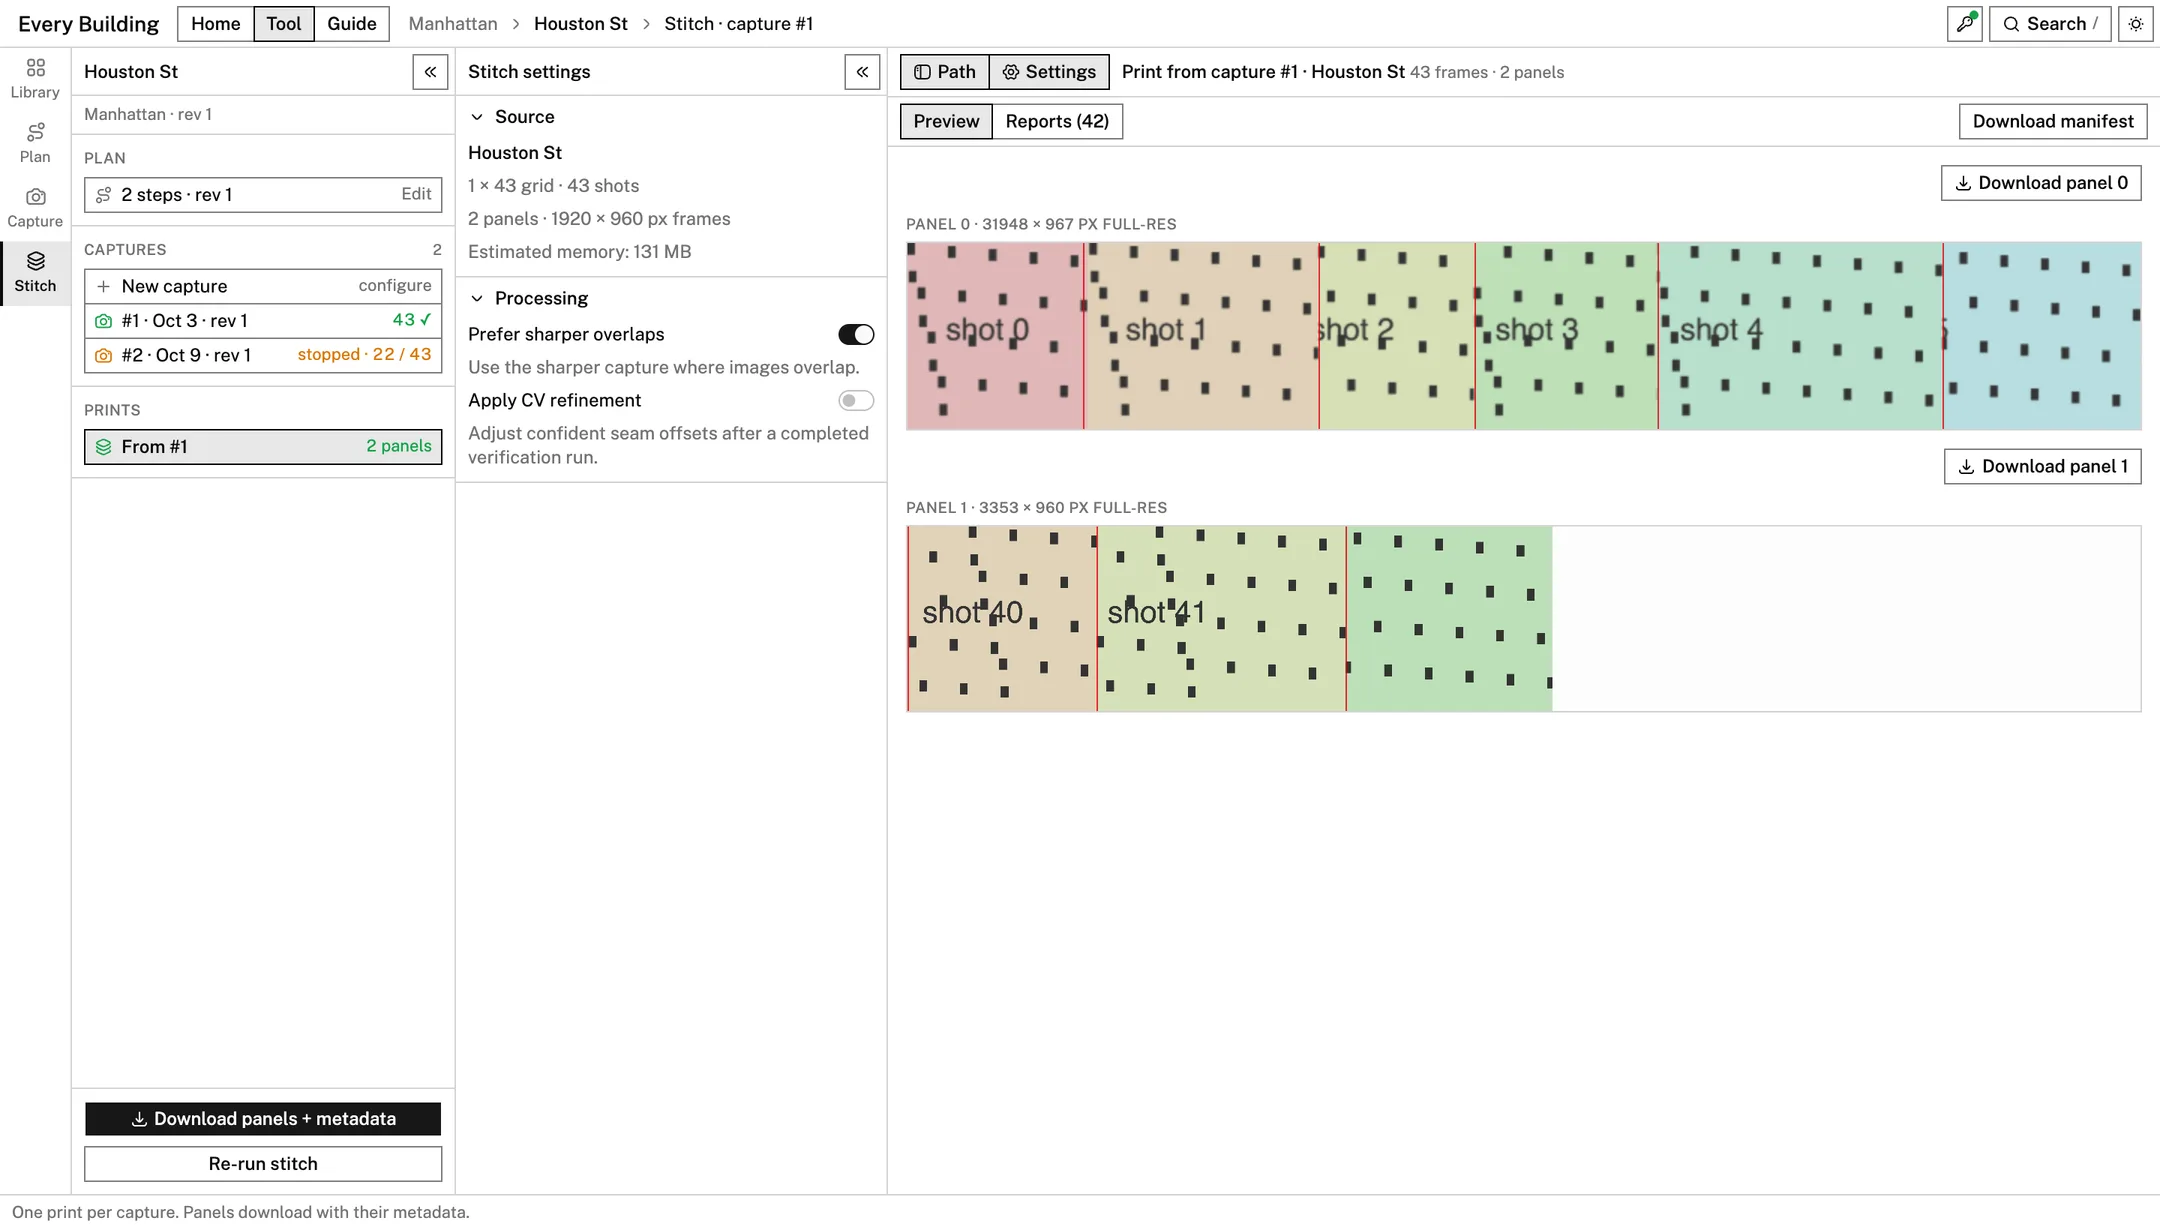
Press Run stitch. The phases are loading, analysing sharpness, drawing, verifying seams and encoding. Panels appear as they are drawn. The stitch keeps running if you go to another stage, or out of the tool to the home page or this guide, and Cancel stitch stops it.
The pictures of a print are not stored: they live in memory for the capture you have open, and opening another capture or reloading the page discards them. What the stitch worked out is stored with the capture: the seam reports, the settings it ran with, and which frame wins each overlap. Opening the capture again draws the print from that, without analysing sharpness or verifying seams, and says so: "Drawn from the stitch of …". Its reports are back in Reports. Re-run stitch stitches it anew and replaces what was stored. A capture that has been added to since is stitched again from the start.
Panels
One street can come out as several panels, for two reasons:
- A browser limits how large a single image can be. A long street is cut where it reaches that limit, and the next panel continues from there.
- The path itself has a break, such as two streets that do not meet.
In Preview, drag a panel sideways to move along it. The caption gives its size in pixels. A thin line marks every seam:
| Line | The seam is |
|---|---|
| Green | Confirmed |
| Amber | Refined |
| Red | Suspect |
| Grey | Not checked yet |
The seam report
Reports lists every seam: the offset the plan predicted (Prior), how far the measurement differs (Measured Δ), the confidence of the measurement, and a verdict.
- confirmed: the measured offset agrees with the planned one.
- refined: the measurement is trustworthy and differs a little. The seam can be corrected.
- suspect: the seam could not be confirmed. The last column gives the reasons, such as too little texture to compare, or a low-confidence match.
Clicking a row shows that seam in the preview. A suspect seam is a place to look at, not necessarily a fault: blank walls and sky give the check nothing to hold on to.
A capture unrolled along the road is checked differently. Its frames are drawn in the road's own coordinates, so the planned offset is exact and nothing is searched for. Instead the two frames are compared where they meet, a blend's width either side of the seam:
- confirmed: they draw the same thing there.
- suspect: their colours differ (content differs), usually because the tiles loaded in more detail for one shot than the other, or one frame draws much that the other does not (coverage differs).
- empty: neither frame draws anything there, so there is nothing to compare. This is not a fault.
Settings
- Prefer sharper overlaps uses the sharper of two shots where they overlap. It is on by default. Changing it after a run discards the print until you run again.
- Apply CV refinement shifts the seams marked refined to their measured position. It becomes available after a run that found such seams, and switching it on starts a new run at once. An unrolled capture has nothing to refine, so it stays off.
The column also shows the capture's grid, its frame size, and an estimate of the memory the stitch needs. A large capture can need more than a browser tab is given; the estimate is marked "(high)" above about 500 MB.
Labels
If the path was saved with street labels, Estimated labels draws over the panels an outline for each building, named by its address on the street you photographed, and a dashed line for each cross street. A building seen in several shots is one outline. Where names would overlap, only some are written; every outline is still drawn.
Labels are never drawn into the pictures. They come from city data, not from the images, and mark where things should be, not exact pixels.
Both sides of a street
Capture the same path twice, once with the camera on each side (camera side in the capture settings), with the same frame width, shot spacing and image size. Then stitch one of the two captures and open Both sides:
- Press Line up with capture #N · camera left (or right). The other capture is stitched beside this one; its progress is shown.
- Both prints are cut to the stretch of street they both cover, so they come out the same length.
- They are shown as in Ed Ruscha's book: this side above, the other side turned 180° below, so the two rows face each other across the street. Each row is cropped to the height its buildings take up. Labels sets, on the white band between them, a house number now and then at the edge of each row (the number only, and only for buildings numbered on this street; the lower row's are turned with it) and the name of each cross street, in black Helvetica.
If a capture of the other side is listed but cannot be lined up, the reason is given under the buttons, for example a different shot spacing.
Downloading
- Download panels + metadata saves one ZIP holding
panel_00.png,panel_01.pngand so on, with amanifest.jsonthat places and describes them. A panel with labels also getspanel_00.labels.svg: a drawing of the same size with only the labels, to lay over the picture in any editor. And the print getslayout.svg: the panels in street order, cropped to their buildings, with house numbers and cross streets set below in the same way as in Both sides, ready to print. - Download panel N saves a single panel.
- Download manifest saves the manifest alone.
- In Both sides, Download both sides saves one ZIP with a folder
per side (
camera-left/,camera-right/), each holding its cut panels, their.labels.svgfiles and its manifest;pair.json, which says which side to show turned, where the stretch starts and ends, and where each side's shots are on the ground; andlayout.svg, both sides laid out as they are shown, ready to print.
layout.svg links the PNG files beside it rather than containing them, so
open it from the unzipped folder (in a browser, Illustrator or Inkscape). The
numbers and names in it are text, never part of the pictures.